Modifying an off-highway vehicle (OHV) to meet street-legal standards is a rewarding DIY project. While you can purchase individual parts, buying a pre-bundled "Universal UTV Street-Legal Kit" is the fastest, cleanest way to get all the components you need, including wiring harnesses, switches, turn signals, and horns. This guide walk you through the process of installing these components on a typical side-by-side vehicle.
Required Tools and Preparation
Before starting, gather the following tools: a basic socket set, wire strippers/crimpers, electrical tape, heat-shrink tubing, zip ties, a digital multimeter, and a power drill with step-bits (for mounting turn signal LED lights).
Disconnect your UTV's negative battery terminal before touching any wiring to prevent short circuits.
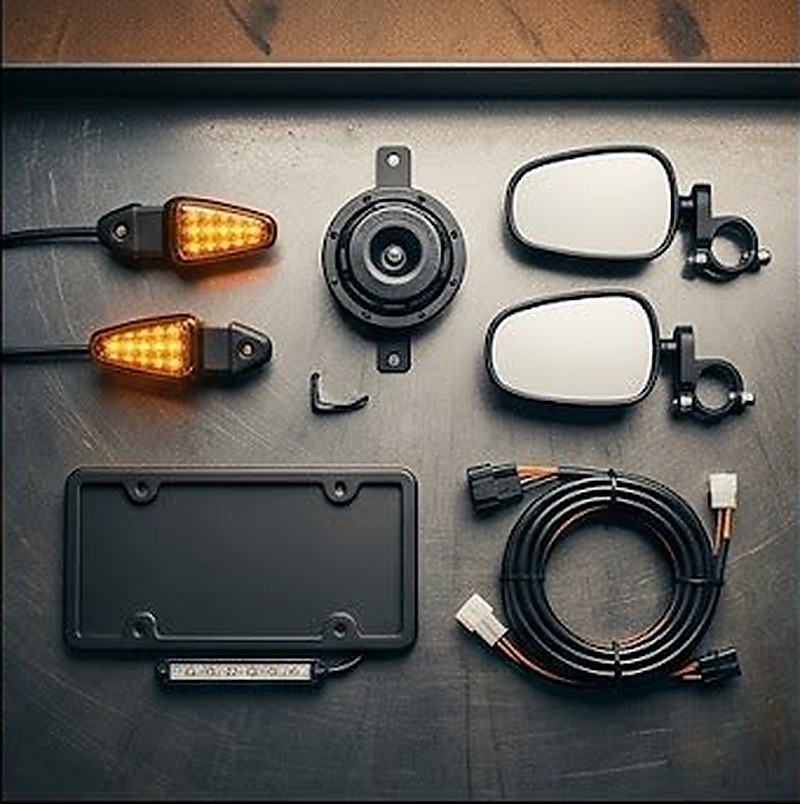
Step 1: Mounting and Wiring Turn Signals
Most street-legal kits come with small, round LED indicator lights that require drilling holes in the plastic body panels, or they integrate directly with your UTV's stock tail lights.
- Front Signals: Drill holes in the front fenders or grill inserts. Mount the amber LED lights. Route the wiring back to the dashboard area, securing it along the frame with zip ties away from moving suspension parts and hot exhaust pipes.
- Rear Signals: Mount the red LED lights on the rear fenders, or connect the kit's wiring harness adapter to your UTV's factory brake light connectors.
- Toggle Switch: Mount the turn signal rocker switch on your dashboard. Connect the front and rear light wires to the corresponding pins on the switch as shown in your kit's wiring diagram. Connect the central power pin to a key-on accessory power source (so the lights only draw power when the ignition is on).
Step 2: Installing the Electric Horn
Public street rules require a horn that is audible from at least 200 feet. A standard automotive-grade electric horn is perfect.
- Mount the horn under the hood on a metal frame member. Face the horn downward to prevent water and mud from pooling inside the horn bell.
- Route a wire from the horn to a momentary push-button switch on your dashboard.
- Connect the other side of the horn to a ground point on the frame, and the switch to the key-on positive accessory circuit.
Step 3: Mounting Mirrors
Most states require at least two mirrors—either a central rearview mirror and a driver-side mirror, or dual side-view mirrors. Clamp-on mirrors designed for roll cages are the easiest to install. Mount them securely to the A-pillars of the roll cage and adjust them to provide a clear view of the road behind you. Use blue thread-locking compound on the mounting bolts to prevent them from vibrating loose during off-road trail riding.
Step 4: License Plate Bracket and Illumination Light
Mount a secure license plate frame to the rear bumper or rear plastics. You must install a small white LED light above or below the plate. Wire this light into your UTV's running light circuit so that the license plate automatically illuminates whenever your headlights are turned on.
KEMIMOTO UTV Turn Signal Kit with Horn
Pre-wired, plug-and-play 10-piece kit — amber LED turn signals, electric horn, hazard switch, and rocker switch included. Compatible with Polaris, Can-Am, Kawasaki, CFMOTO, and most universal-fit side-by-sides. Covers the core requirements for most state street-legal inspections in one box.
View on Amazon →As an Amazon Associate we earn from qualifying purchases at no additional cost to you.